Mask
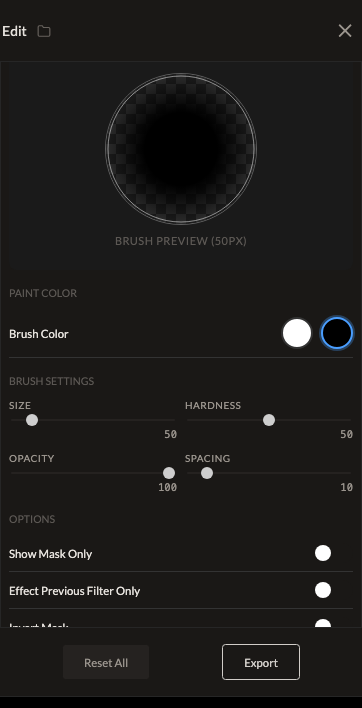
Mask restricts filters above it in the stack to a hand-painted region of the image — the tool for applying any edit (blur, color grade, exposure, anything) selectively instead of to the whole frame.
Parameters
| Parameter | Type | Range | Default | What it does |
|---|---|---|---|---|
| Invert Mask | toggle | off | Swaps the painted and unpainted regions. | |
| Brush Size | number | 1 to 500 | 50 | Paintbrush diameter. |
| Brush Hardness | number | 0 to 100 | 50 | Brush edge softness — lower values feather the brush stroke. |
| Brush Opacity | number | 0 to 100 | 100 | How fully each brush stroke masks. |
| Invert Brush Color | toggle | off | Paints in "erase" mode instead of "add" mode. | |
| Brush Spacing | number | 1 to 100 | 10 | Spacing between stamps as you drag the brush. |
| Effect Previous Filter Only | toggle | off | Scopes the mask to only the single filter immediately before it, instead of everything above it. |
How it works
A Mask filter's position in your stack determines its scope: by default, it masks every filter above it back to the top of the stack (or the previous mask, if there is one); with Effect Previous Filter Only enabled, it masks just the one filter directly above it. Paint directly on the image in the editor to define the masked region — there's no separate mask-shape tool, only the brush.
See also
Combine Mask with Blur (Gaussian) for a selective background blur, or with any color/tone filter for localized dodging and burning.
Control preview
JSON structure
{
  "id": "mask",
  "enabled": true,
  "params": {
    "invertMask": false,
    "brushRadius": 50,
    "brushHardness": 50,
    "brushOpacity": 100,
    "brushInvert": false,
    "brushSpacing": 10,
    "effectPreviousFilterOnly": false
  }
}